UT-88. Running the complete configuration.
I hope you enjoyed playing with the minimal configuration of the computer. Now let’s see how it can be launched in complete configuration.
“UT-88” computer is supposed to be built step by step, starting with minimal configuration and then adding additional blocks to extend its functionality. That’s why it is a bit complicated to use.
After we run the computer in a minimal configuration, we can switch it to a complete setup. To do this, ROM with “MONITOR-F” needs to be turned on. It can be done by moving switch SW[3] to position “1”. Also, make sure that 1Hz timer interrupts are turned off (SW[6] to “0” position) because they are not supported in full mode. Now we can run it by the command 7 F800.
Now we can switch the PS/2 keyboard to full mode if it was in keypad mode by turning on switch SW[1]. Also, we don’t need 7-segment indicators on the screen any more, so you can switch them off with SW[0].
To use all available memory, we can turn off ROMs used for minimal configuration (switches SW[2] and SW[4] to the “0” position”). In this case, addressable memory will be:
0000 – DFFF – RAM
E000 – E7FF – video RAM
E800 – EFFF – video RAM double. It contains the same content as video RAM because of the “UT-88” design.
F400 – F7FF – RAM that is used by “MONITOR-F” for its purposes
F800 – FFFF – ROM with “MONITOR-F” When all ROMs for “MONITOR-0” are turned off, accessible RAM in complete configuration is 56 Kbytes.
I added a RAM block where I put a famous “TETRIS” game. When it’s turned on by SW[5], it replaces the range 3000-3FFF by itself. This RAM block behaves exactly like ordinary RAM, but because it is not ROM, the game in there can be damaged if something has been written in this range when this block is turned on. If it happened, then turning DE1 on and off restores it. To run the game G3000 directive is used.
So to use the computer in full mode, switches should be changed to the following position after the computer has been launched in “MONITOR-0”:
SW[0] – “0” if you want to turn them off on the VGA display.
SW[1] – “0” to use PS/2 keyboard in full mode.
SW[2] – switch to “0” after running “MONITOR-F” to free RAM in the range 0000-0FFF. Please make sure that SW[6] is turned off before that.
SW[3] – “1”
SW[4] – “0”, to free RAM range 2000-23FF
SW[5] – “1” if you want TETRIS to be preloaded in 3000-3FFFrange
SW[6] – 1Hz timer interrupt. Must be turned off before turning off “MONITOR-0”
SW[7] – “0”. This switch is responsible for a set of characters that are used. If “0”, the standard characters set of “UT-88” is used. It has only capital Latin and Cyrillic letters. Some programs for OS CP/M use minor Latin characters instead of Cyrillic. The second set of characters has been implemented to make it possible to use such programs. It replaces capital Cyrillic characters on low caser Latin. It can be done at any time by turning on the switch and have immediate effect.
SW[8] – “0”. If you put this switch in position “1”, the CPU will go to “HOLD” mode. This mode is used for debugging and to read/write memory dumps with “DE1 CONTROL PANEL”.
SW[9] – position of this switch doesn’t matter
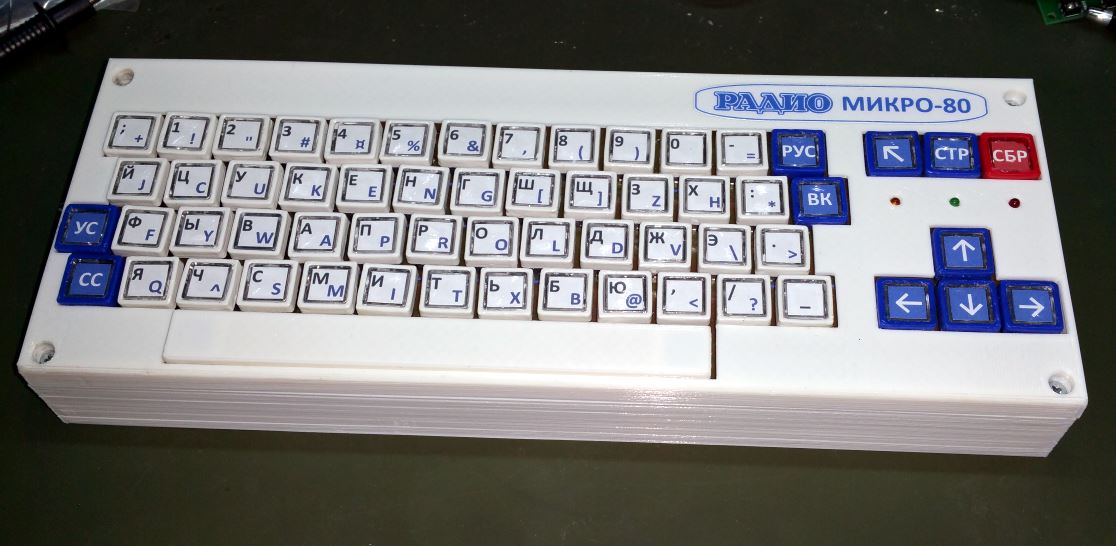
KEYBOARD
In the keypad mode of minimal configuration (SW[0] is in the “0” position), only numeric keys from ‘1’ to ‘0’ and letter keys ‘A’, ‘B’, ‘C’, ‘D’, ‘E’ and ‘F’ are available. As the ‘ШН’ button, KEY[3] on the DE1 board or “Tab” button can be used. The “RESET” button is allocated to KEY[0] on DE1 of the “Esc” button.
In the full keyboard mode of complete configuration (SW[0] is in the “1” position), the following buttons are available:
 To produce characters highlighted in blue, hold the SHIFT button. For green – “CC” button. ‘*’ can be generated by the following combination: SHIFT + CC + “;” . The layout is not ideal because the original keyboard stays far from PS/2. But you can change it by yourself using the project’s source code.
Russian layout, when the ‘РУС’ button is pressed, looks this way:
 So, we launched the computer in full mode and even can print something on the screen. Great! In the following post, I’ll show MONITOR-F’s commands and how we can use them.