3D printer MakerFarm Prusa i3 8″
Finding a proper enclosure for my devices was always a problem. So, I decided to build a 3D printer for these purposes. It is a great project to build. It can be used not only for customised enclosures but for other projects.
I didn’t want to buy a pre-build printer as I preferred to build one for fun. I checked available kits on the market, which have quite good reviews, can print something bigger than 150mm x 150mm and don’t cost a fortune. Makerfarm Prusa i3 8″ ticked most boxes, so I ordered it. The kit was sent from the USA, so it didn’t take long to arrive. The kit is great. It has everything in the box except a piece of glass to print on and a power supply. It even had a 4Gb SD card supplied. I ordered two pieces of glass in the nearest handyman centre for $14, and I already had an old ATX power supply to use with the printer. The seller has a great manual with videos, which helped build the printer. According to the seller, it took almost the whole weekend to build it instead of the estimated two hours. It was an exciting process, and I enjoyed it a lot. On Sunday afternoon, I was already able to print the test cube. It looked good but required adjustments as the Y-axis shifted slightly, and the X-motor was overheating. The seller recommends using hairspray to avoid wrapping, but large ABS prints are still wrapped with it, so I decided to use “ABS juice” instead. It is messier but holds prints significantly better. Also, prints get a glossy surface with this solution. “ABS juice” is acetone with some ABS plastic dissolved in it. It should be a milk-like solution, and I had to have separate jars for different ABS colours. After printing, the glass must be wiped off with some acetone on a tissue and more “ABS juice” applied to the same tissue. More effort is required to change a colour, but not much. Also, to improve adhesion to the glass, I print with a 6-7mm brim setup. The brim is easy to remove, and I recycle it in an “ABS juice” solution. The adhesion is so good with this method that the part and the glass must cool down completely before removing it. Otherwise, the glass can be damaged.
For ABS I use 115C heatbed temperature. It proved to show the best results for me. I haven’t tried to print with PLA yet, where I still will have to use hairspray. Three hotend options were available with the kit – 0.4 mm Magma hotend and 0.35 mm and 0.5 mm classic J-Head. I chose 0.35mm J-Head. It is good for small details and can print with PLA, but it prints quite slowly and is too small for the new “wooden” and “ceramic” filaments. The 0.5 mm J-Head prints quicker and can use “wooden” and “ceramic” filaments, but the details suffer a bit. The choice depends on the main purposes for which the printer will be used.
The new 0.4mm Magma hotend is a metal one that allows printing with a wider range of materials, such as nylon, poly-carbonate etc. They require a temperature of up to 300C, which is too high for J-Head. The nozzle diameter is still too small for “wooden” and “ceramic” filaments, and it is difficult to use PLA with this head as it melts before reaching its bottom and jams. Unfortunately, it is not easy to change a hotend on this printer. But maybe there is a possibility to change a hotend to a competently different model that allows replacing nozzles. I haven’t investigated this opportunity yet.
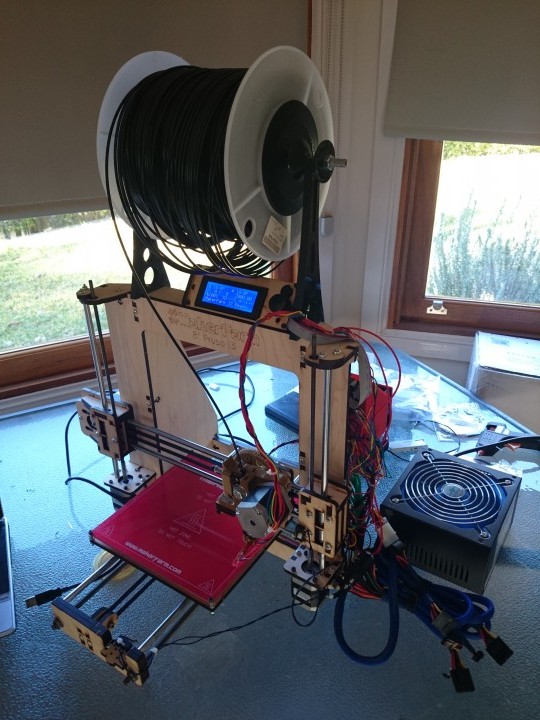
The printer doesn’t have a spool holder, but I printed it out by combining some ideas from thingiverse.com. I’ll describe it in my next blog. Here is the photo of my printer:
And this is an example of cutlery stand that I’ve printed using yellow and black ABS plastics and assembled them:
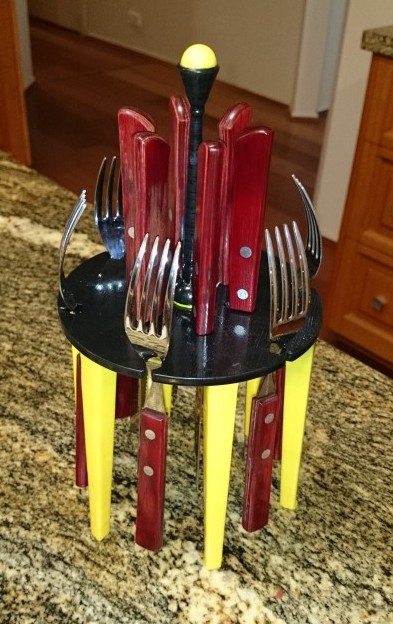
I’ve uploaded this design to Thingiverse as well: http://www.thingiverse.com/thing:426792.
Overall, I’m quite happy with the printer and recommend this kit. See ya!